This guide will help you to convert your .Avi files into DVD's with subtitles. I have tried my best to make it simple and error free , however, If you find any errors or problems please feel free to contact me.
In order to use this guide you must have Tmpgenc Plus 2.5 and Tmpgenc DVD Author 1.6 registered versions , except the above mentioned programs all other softwares used are freeware. So, let's move onto the guide.
Required Softwares: VirtualDub Mod or NanDub (Freeware)
GSpot (Freeware)
VobSub (Required for subtitles only-Freeware)
ffdshow Video Codec Pack ( Required for way 2 of adding subtitles- Freeware)
ffmpegGUI (Freeware)
Tmpgenc Plus 2.5 + (Shareware)
Tmpgenc Dvd Auhtor 1.6 + (Shareware)
Note:This guide is just that, a guide! In order to use it you must have TMPGEnc Plus (unless the free version work's!) and TMPGEnc DVD Author ! All these program's are excellent and should be supported as such! Errors,Suggestions and comments are welcome.Thank you!
--------------------------------------------------------------------------
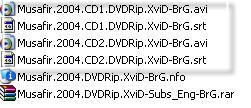
1- First of all make sure that the name of your .AVI file and .srt file is simillar (except the extension) as shown in the image1 below.
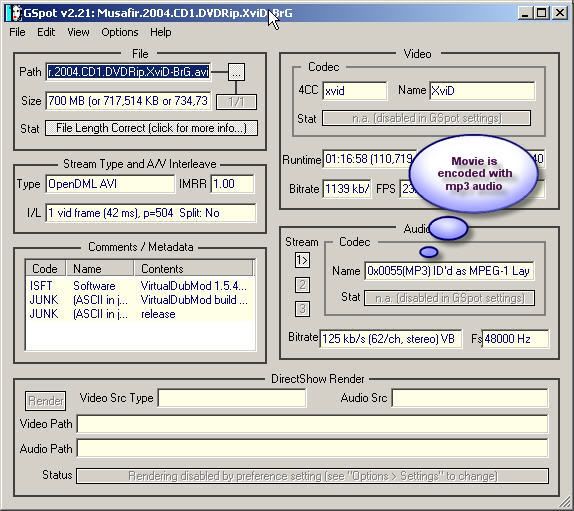
2- Now open your .AVI file with GSpot to check the audio and video format as shown in the image2 below. As you can see the file we are going to use is encoded with MP3 Audio So, we have to convert it to AC3 format.
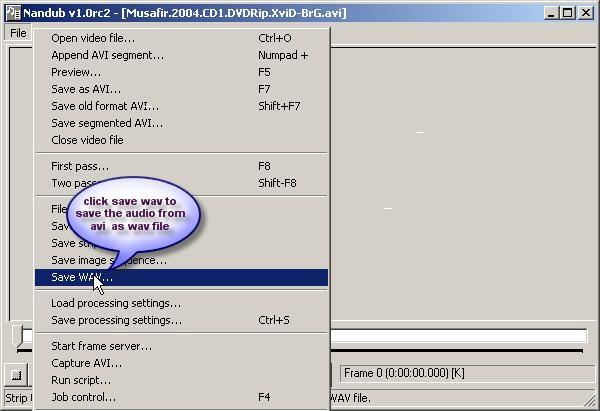
3- Now open your .AVI file with Nandub and save the audio as .wav file as shown in the image3 below.
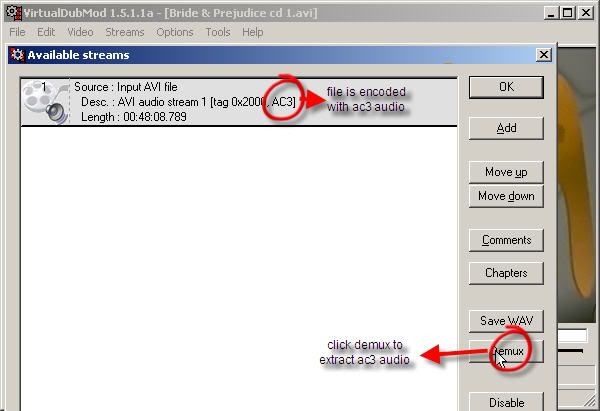
- If your file is encoded with ac3 audio than you have to extract it simply in VirtualDub Mod as shown in the image 4 below.
4- Now we will convert .wav file which we extracted from .AVI file using Nandub to AC3 format using ffmpegGUI (Image5) . If you are working with 2 files than do the same process for both files.
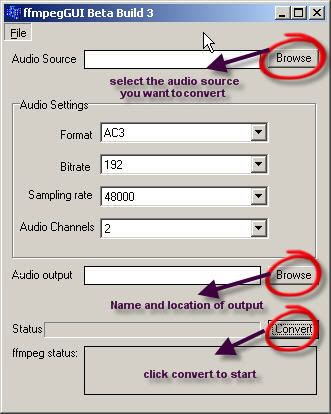
- Open .wav file in ffmpegGUI and chose settings as shown in the image above, select your output folder and filename and click convert. This process will take 5-15 minutes
Adding Permanent Subtitles
You can add permanent subtitles using one of the methods explained below.
Way 1- Using VobSub:
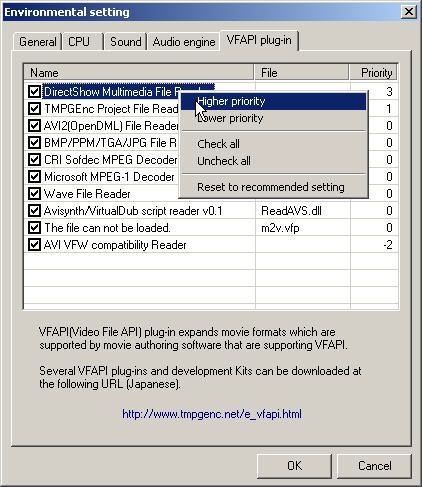
5- Download and Install VobSub. Make sure that file name of both .AVI file and .Srt files are same as shown in Image 1. If you can't see subtitles during preview in Tmpgenc than click options>Environmental setting>VFAPI Plugin and increase the priority of Direct show Multimedia reader until it becomes at top as shown in the image6 below.
Now the subtitles should appear during preview in Tmpgenc as shown in the image7 below.

Way 2- Using ffdShow:
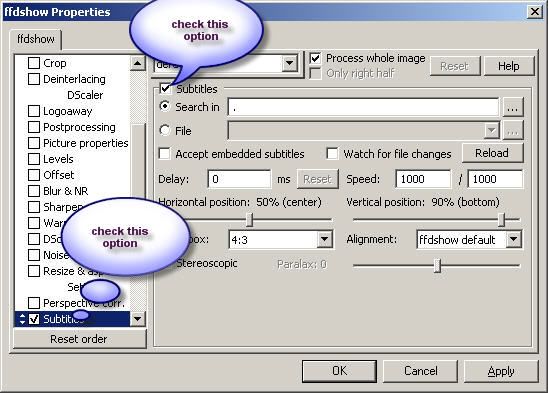
6- Recently I came to know that subtitles can be added using ffdshow codec pack aswell. All you have to do is to open ffdshow configuration as shown in the image8 below. Again make sure that file names are simillar as shown in the image1 and improtantly uninstall Vobub or disable auto loading version of VobSub otherwise you will see two subtitles.

- check the subtitle option in configuration window as shown in the image9 below..
- Now the subtitles should appear during preview, If so than you are done.
Now let's move to the next step of guide and that's of encoding using Tmpgenc.
7- Open TmpgencEnc plus and project wizard will open automatically if not than click file>Projectwizard as shown in the Image10 below.
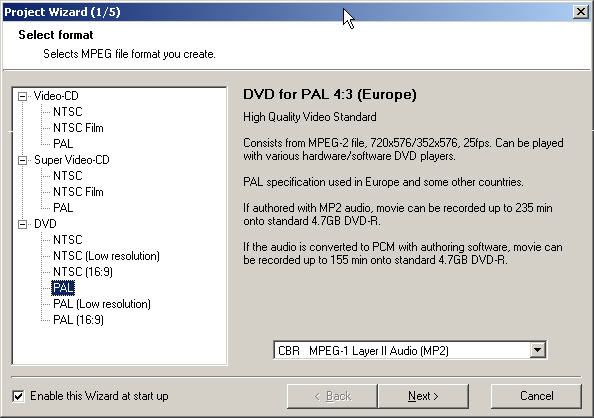
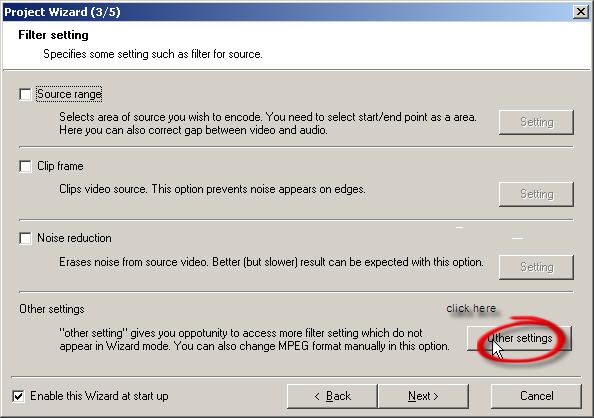
- Select PAL or NTSC according to your region and audio as CBR-MP2 as shown in the image 10 above. In the next window simply select your file and click next.8- After selecting your file now click on the Othersettings button as shown in the image11 below.
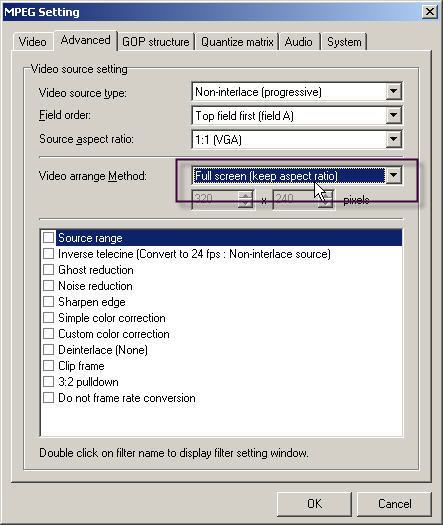
- A new window will appear with some options, click on Advanced Tab and select your screenratio, I will use Full screen keep aspect ratio option as shown in the image 12 below. You can select other options as well if you know what are you doing otherwise simply select Full screen keep aspect ratio.
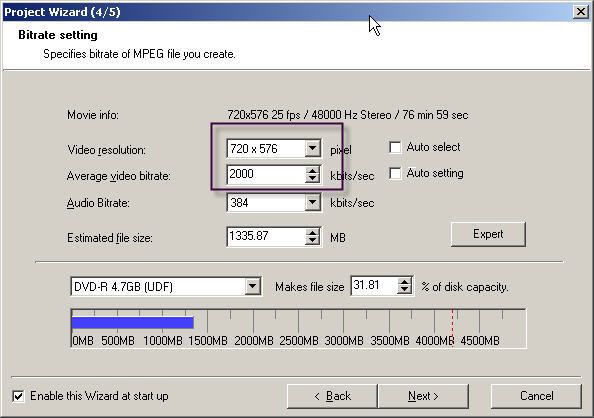
9- Click Next and now select the video resolution that's 720x576 and Video bitrate as 2000 kbits/sec. You can select higher bitrate as well but I don't see any difference in quality by increasing birate, this way you can also add 2 movies in 1 dvd while authoring.
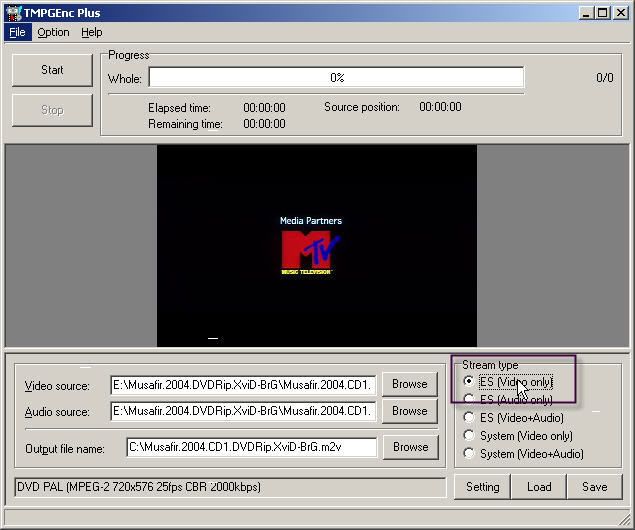
- Now click next and select your output destination and make sure that you uncheck the start encoding immediately option.10- Now select video only option as shown in the image below and click save project from file>saveproject.
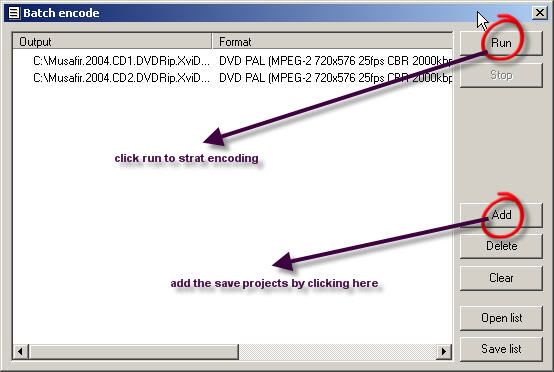
Now if you have only one file to convert than start encoding by click start button, otherwise you have to save this project by clicking file>saveproject. If you have more than one file to convert than do the same process for second file and so on.11- Now after doing the same process for rest of your files click batch encode from file>batch encode as shown in the image below and click run.
That's it now this conversion can take up to 12 hours depending on your PC.
After Conversion you have to Author DVD in Tmpgenc Dvd Author. Click here for the guide.
Authoring is not that difficult but if you don't know than wait until tomorrow i will post the guide.
In case the images are not loading then you can access this guide at my very own site as well.click here
QaisarSoft
Please don't waste my bandwidth and click only if images are not loading.
Please leave comments,suggestions and errors.
I will try my best to keep this guide uptodate and please don't ask me for cracks ..you can get TmpgencEnc Plus and Author from most of the torrent sites.
No comments:
Post a Comment